
最後更新時間: 2025-10-31
本教學將教您如何在 Windows 10 與 Windows 11 系統中,將 Windows Update 元件與原則完全重設為預設值。
Windows Update 透過自動下載並安裝微軟發佈的最新更新、驅動程式及修補程式,持續為 Windows 11 提供系統更新。
有時您可能會遇到 Windows Update 相關問題,例如無法下載或安裝更新、出現錯誤訊息、無法搜尋新的更新、更新擱置問題等。這類問題可能源於 Windows 更新資料庫或元件損毀、相關服務未執行等狀況。
重設 Windows Update 元件通常能解決此類問題。
執行重設前,請務必以系統管理員身分登入。
請注意: 重設操作不會清除 Windows Update 記錄。
重設 Windows Update 元件|修復 Windows 10/11 更新錯誤與安裝問題
■ 下載連結
使用教學簡介:
1. 將 Reset_Reregister_Windows_Update_Components_for_Windows11.zip 解壓縮為Reset_Reregister_Windows_Update_Components_for_Windows11.bat
2. 執行 .bat 檔案。
3. 若出現使用者帳戶控制 (UAC) 提示,請按下 [是] 以允許以系統管理員身分執行。
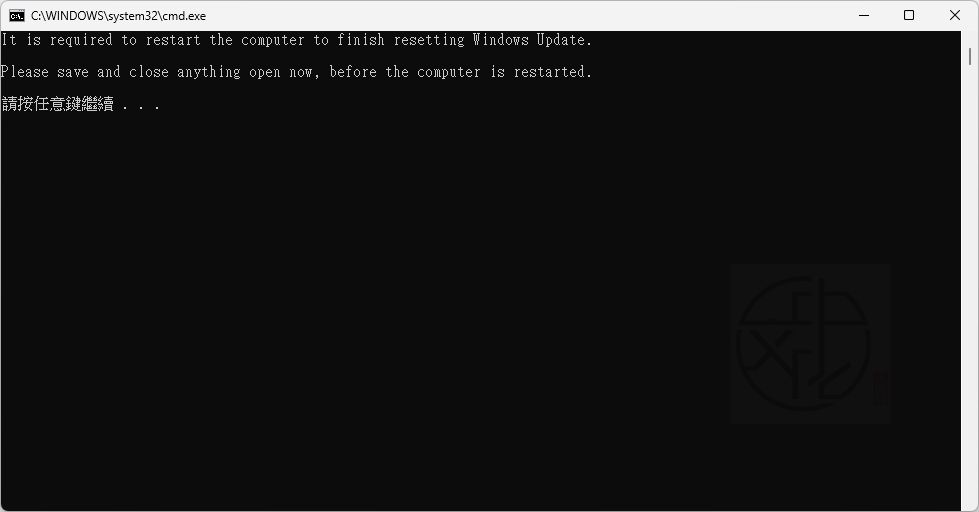
4. 當重設 Windows Update 完成後,系統將提示「Please save and close anything open now, before the computer is restarted. (請先儲存並關閉所有開啟的檔案,電腦即將重新啟動)」,準備就緒後按任意鍵繼續。
若某項服務在三次嘗試後仍無法停止,.bat 檔案將自動結束並顯示「Failed to reset Windows Update (重設 Windows Update 失敗)」訊息,同時提示按任意鍵繼續。
按下任意鍵後,.bat 檔案將重新啟動先前停止的所有服務,隨後關閉命令提示字元視窗。
5. 此時系統將提示按任意鍵立即重新啟動電腦 (Restart computer now)。

此操作將立即重啟電腦。請先儲存並關閉所有開啟的檔案後再繼續。
執行 .bat 檔案後務必立即重啟電腦以套用設定,期間請勿開啟其他程式。
喜歡我的文章歡迎大家分享,請別忘了到 威盛電腦 粉絲專頁 按讚並在「追蹤設定」中將其設為最愛,或者每天到 中文化天地網 網站 逛逛,獲得最新的軟、硬體資訊。
![Read more about the article [教學] 如何檢查 Windows 電腦上的 SSD 健康狀態](https://zhtwnet.com/wp-content/uploads/2025/11/CrystalDiskInfo_SSD_health.jpg)

